
Docs Category
Git Authentication for Push, Pull, and Self-Hosted Remotes
Critiq supports the main Git authentication patterns teams actually use: OAuth for GitHub, GitLab, Bitbucket, and Azure DevOps, SSH keys for standard Git remotes, and self-hosted provider setup for GitLab, Gitea, and Forgejo.
For HTTPS remotes, Critiq will use connected provider tokens when available; otherwise it falls back to your system Git configuration such as SSH or your credential helper. Configure one of the flows below to keep push, pull, and fetch seamless.
In-App OAuth (GitHub/GitLab)
Critiq supports OAuth sign-in for GitHub, GitLab BitBucket and Azure DevOps so you can connect accounts without manually managing tokens. Use this for PR review, branch browsing, and cloud-aware workflows, plus HTTPS push/pull/fetch when a linked account matches the remote.
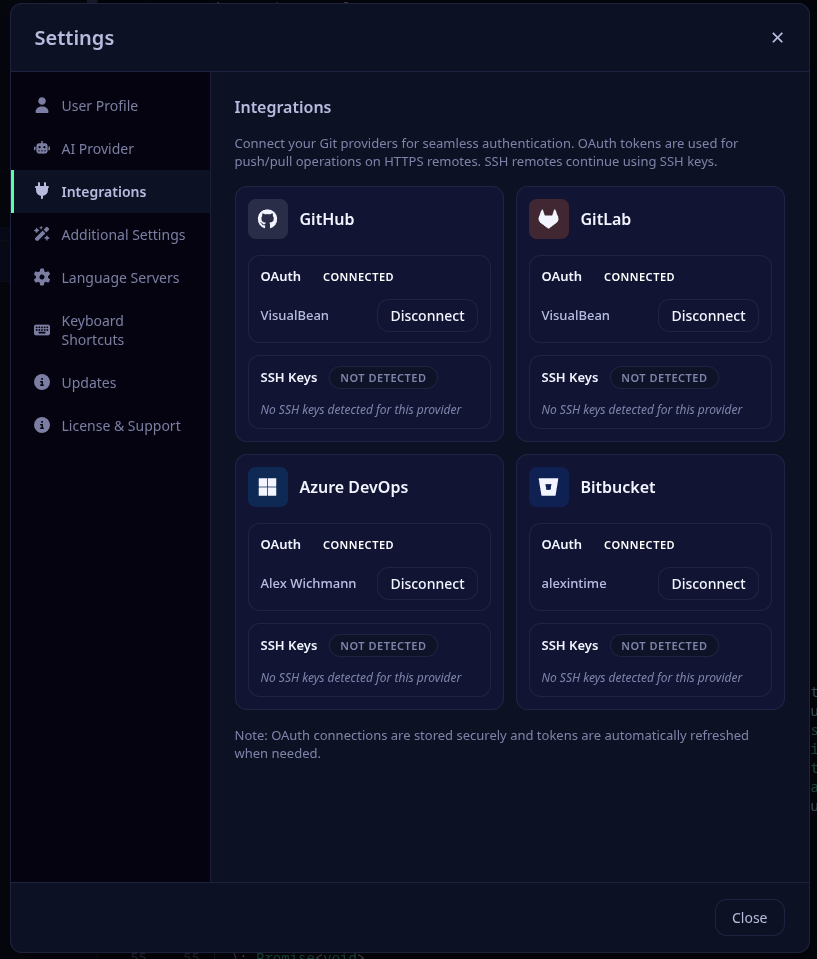
- Open Critiq and go to Settings → Accounts.
- Click “Sign in with {provider} and complete the OAuth flow.
- For HTTPS remotes, Critiq will use your connected account token for push/pull/fetch; SSH remotes still use your keys.
Self-Hosted Git Providers (Gitea/Forgejo/GitLab)
Critiq supports self-hosted Git providers like Gitea, Forgejo, and GitLab Self-Hosted with full OAuth authentication. You can configure multiple instances with custom names and credentials.
Gitea / Forgejo Setup
-
Create OAuth Application in Gitea/Forgejo:
- Navigate to your Gitea/Forgejo instance (e.g.,
https://git.company.com) - Go to Settings → Applications → OAuth2 Applications
- Click Create a new OAuth2 Application
-
Fill in:
- Application Name: Critiq
- Redirect URI:
http://localhost:8765/callback -
Permissions: Select
repoanduser:email
- Save and copy the Client ID and Client Secret
- Navigate to your Gitea/Forgejo instance (e.g.,
-
Add to Critiq:
- Open Critiq and go to Settings → Integrations → Self-Hosted Providers
- Click Add Self-Hosted
-
Fill in:
- Name: A friendly name (e.g., "Work Gitea")
- Platform: Gitea / Forgejo
-
Base URL: Your instance URL (e.g.,
https://git.company.com) - OAuth Client ID: Paste from step 1
- OAuth Client Secret: Paste from step 1
-
OAuth Scopes:
repo, user:email(or leave empty for defaults)
- Click Add Provider
- Click Connect with OAuth to authenticate
GitLab Self-Hosted Setup
-
Create OAuth Application in GitLab:
- Navigate to your GitLab instance
- Go to User Settings → Applications
-
Fill in:
- Name: Critiq
- Redirect URI:
http://localhost:8765/callback -
Scopes:
api,read_repository,write_repository
- Save and copy Application ID and Secret
-
Add to Critiq:
- Open Critiq and go to Settings → Integrations → Self-Hosted Providers
- Click Add Self-Hosted
-
Fill in:
- Name: A friendly name (e.g., "Company GitLab")
- Platform: GitLab Self-Hosted
-
Base URL: Your instance URL (e.g.,
https://gitlab.company.com) - OAuth Client ID: Paste Application ID from step 1
- OAuth Client Secret: Paste Secret from step 1
-
OAuth Scopes:
api, read_repository, write_repository(or leave empty for defaults)
- Click Add Provider
- Click Connect with OAuth to authenticate
Note: Self-hosted providers work exactly like built-in providers. OAuth tokens are used for HTTPS push/pull/fetch, code review features are fully supported, and repositories are automatically matched by remote URL hostname.
Recommended: SSH Keys (Most Common)
SSH keys are the most reliable and secure method for git authentication.
Setting up SSH Keys
-
Generate an SSH key (if you don't have one):
Press Enter to accept the default file location and optionally set a passphrase.ssh-keygen -t ed25519 -C "your_email@example.com" -
Add your SSH key to the ssh-agent:
eval "$(ssh-agent -s)" ssh-add ~/.ssh/id_ed25519 -
Add the public key to your git provider:
-
GitHub: Copy your public key:
cat ~/.ssh/id_ed25519.pub→ Go to GitHub Settings → SSH and GPG keys → New SSH key → Paste your public key and save -
GitLab: Copy your public key:
cat ~/.ssh/id_ed25519.pub→ Go to GitLab Preferences → SSH Keys → Paste your public key and save -
Azure DevOps: Copy your public key:
cat ~/.ssh/id_ed25519.pub→ Go to User Settings → SSH public keys → Add → Paste your public key and save
-
GitHub: Copy your public key:
-
Update your git remote to use SSH (if currently using HTTPS):
cd /path/to/your/repo
git remote set-url origin git@github.com:username/repository.git
Alternative: GitHub CLI
If you primarily use GitHub, the GitHub CLI provides an easy authentication setup:
- Install GitHub CLI: https://cli.github.com/
-
Authenticate:
Follow the prompts and select "HTTPS" when asked about git protocol.gh auth login
This configures git credential helper automatically.
Alternative: Git Credential Manager
For HTTPS authentication with credential storage:
- Install Git Credential Manager (comes with Git for Windows, separate install on macOS/Linux)
-
Configure git to use it:
git config --global credential.helper manager-core - First push/pull will prompt for credentials and store them securely
Troubleshooting
"Permission denied (publickey)" error
- Your SSH key is not added to your git provider
- Follow the SSH setup steps above
"Authentication failed" error
- If using HTTPS, configure Git Credential Manager or GitHub CLI
- Or switch to SSH authentication (recommended)
Previous OAuth-based git clients
If you previously used a git client with its own OAuth authentication system, that authentication won't work with standard git tools. You'll need to set up SSH keys or use one of the alternative methods above.